How to update your Instance
Prerequisites
- Create a brand-new instance using the newest version of GTNH following the guide for Installing GregTech: New Horizons 2.5.1
Instructions
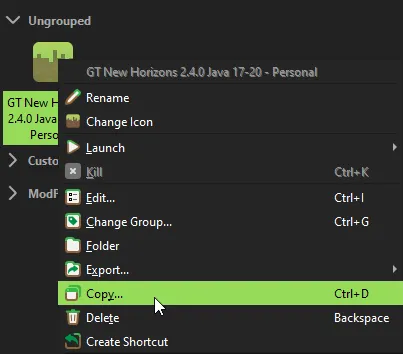
Step 1
Right-click the old modpack and click “Copy…”
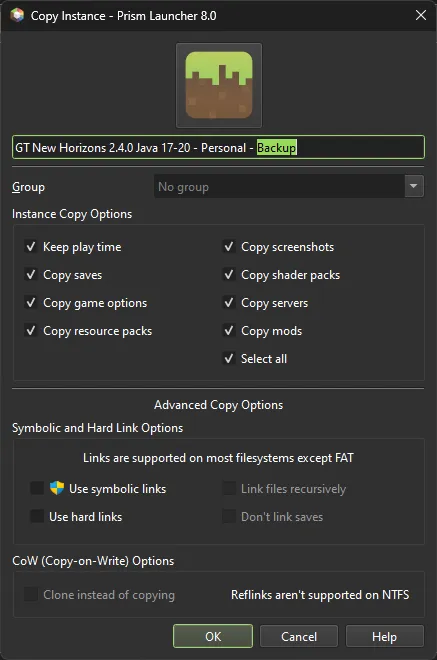
Step 2
Name it whatever you’d like, this is your backup in case something goes wrong. Once you’ve named it, click “OK”.
Step 3
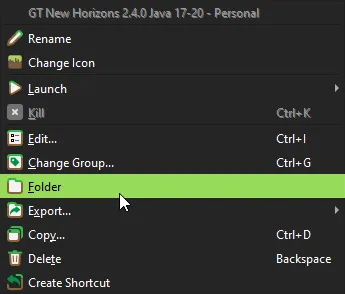
Now to copy the updated files over to your old modpack instance.
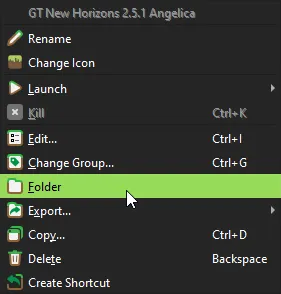
- Right-click the old modpack and click “Folder”
- Enter the folder
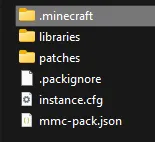
- Delete the folders
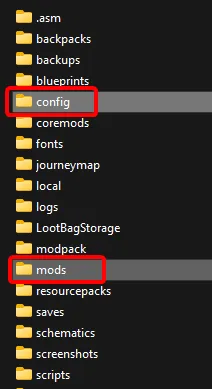
- Now back in PrismLauncher, Right-click the new modpack and click “Folder”
- Enter the folder
- Copy the folders

Step 4
Right-click the new modpack and click “Rename”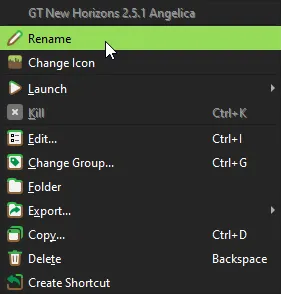
Step 5
Right-click the new modpack and click “Delete”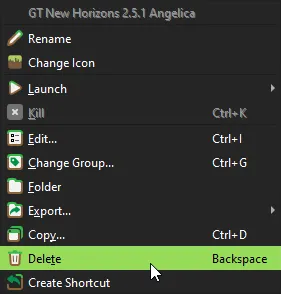
Step 6
Right-click the old modpack and click “Rename”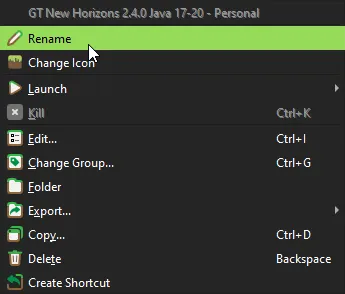
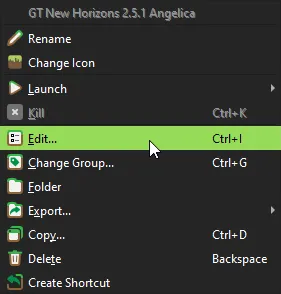
Step 7
Right-click the modpack and click “Edit…“.
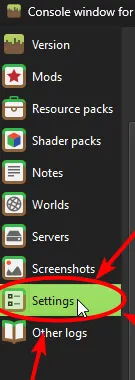
Step 8
Click on “Settings” in the sidebar of the newly opened window.
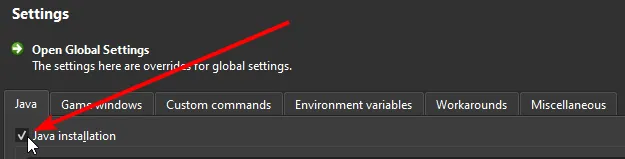
Step 9
Click on the checkbox labelled “Java installation”. It should now have a checkmark.
Next choose the JDK that matches your setup.
GraalVM JDK 21
Remember the folder location I told you to remember? You’ll need that for this.
Step 9a-1
Fill the field shown with *FOLDER_LOCATION*/bin/javaw.exe make sure you replace *FOLDER_LOCATION* with the actual folder location.
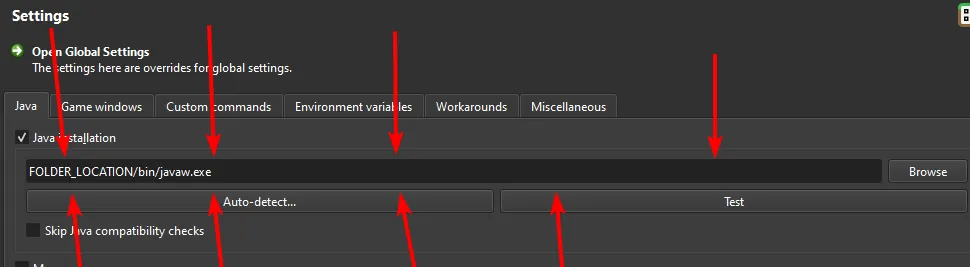
Here is what a valid location should look like (The path may look a little different from yours, that’s fine, as long as the path points to a file called javaw.exe, and that file actually exists.)

Step 9a-2
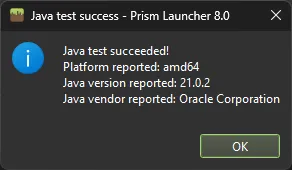
Verify that the location is correct by clicking on the “Test” button.

If this window displays “Java test succeeded!” and “Java version reported: 21” then you’re all set.
Other JDK 21
This is for JDK’s that used an installer. If you don’t have Java 21 installed, and you don’t want to deal with setting up Graal for it’s performance improvements. You can download an installer for Java 21 from Adoptium .
Step 9b-1
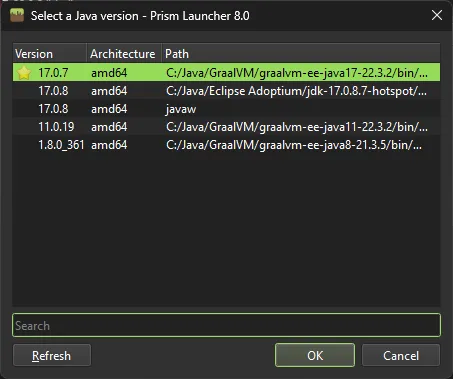
Click on the “Auto-detect…” button.

Step 9b-2
Select an entry from the list with a version of “21.x.x”. then press “OK”.
Step 9b-3
Verify that the install is correct by clicking on the “Test” button.
If this window displays “Java test succeeded!” and “Java version reported: 21” then you’re all set.